Showing posts with label frame. Show all posts

Sunday, March 8, 2015

Wakefield Willys Update 8.2

So it has been a month, an update is needed.

More rust has been removed and we are getting closer to full restoration.  I am almost done cutting away the bad stuff and ready to do repair work.  At this point, old paint needs to be removed and a few rust spots cut out.  But we are at that turning point of rebuilding the body.  In fact we already have done some welding and rebuilding.

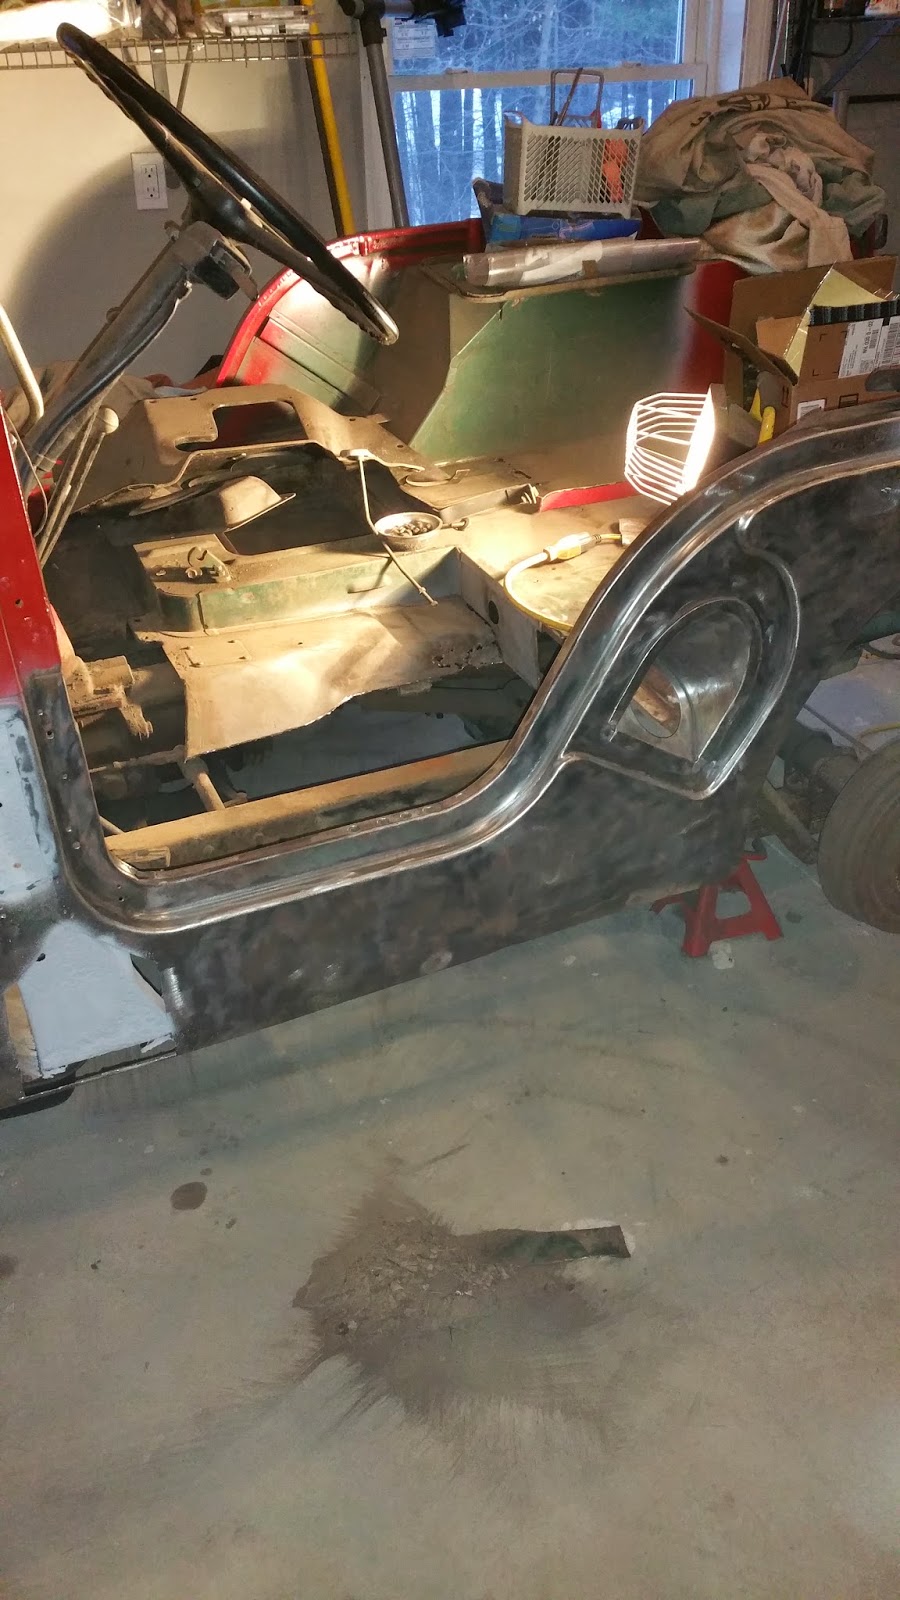
I probably should have done a frame off restoration, but I am trying to do this on the cheap.  Well even though I have not done a frame off restoration, I am doing a hybrid version of it.  By removing a large section of the floor, I can get to the frame easily.  I have cleaned it and painted it with this undercoating rubberized black paint.  You can see the newly painted frame in the first photo. 

Sitting on top of it is the new floor supports from Classic Enterprises.  It looks good and I am looking forward to welding that into place, but I need to address the gap between the new floor support and the existing floor support.


Saturday, February 7, 2015

Wakefield Willys Update 8.1

So it has been 2 months since I have posted, but work has been steadily been getting done.  Since my last update, I have been patching and welding rust spots on the Jeep Tub.  It sometimes feels like I fix one spot, and 5 more previously unknown problems appear.

The biggest shock was the floor panels.  I knew they were bad, but I thought I could patch it like others had done before.  Boy I was wrong, they needed to be cut out and replaced.

Today, I cut out the driver side floor panel.  It went well.  The frame looks good, thanks to the caked on Pennsylvania Clay.  When I went underneath to inspect the floor, I was stunned to find wood supports.  They are original, from the factory.  They will be taken out and replaced with steel.

The replacement panels come from Classic Enterprises.  They look great, and hope to put the first one in with floor supports very soon.


Saturday, October 27, 2012

Wakefield Willys Update 5.12


Progress, and new challenges.

The frame is painted, the rear of the willys is painted.  It is time to assemble the 3 remaining pieces of the jeep.  2 rear panels, and the rear valence with the tailgate.  I wish it was as easy as bolting them to the rear bumper, but it is not.

If you look closely at the rear panel attached and the rear corner they don't match up.  Not surprising considering the age of the tub and it has probably been sagging for decades.

So what to do?  See the engine crane lying there in the background.  I think it maybe time to reassemble it and use it to lift of the rear corner.  I might have to do it on both corners, I am fairly certain both sides will need some help.

So I am going to attach the other rear panel and see how bad it is, and then probably decide to erect the engine crane.  Exciting times, glad the tools are here to work with.

Monday, October 15, 2012

Wakefield Willys Update 5.11


With cold weather approaching, painting gets more difficult.  So taking advantage of a mild day, I cleaned, painted and rubberized the rear portion of the willys jeep.  The frame, the rear bumper are all cleaned up and drying as we speak.

Feels good to be done with this, now on to the floor, rear panels and rear valence.  Yikes! We are close to being done!


Saturday, October 6, 2012

Wakefield Willys Update 5.10

 Slow but steady.

As you can see by the first picture, the replacement pieces are welded in over the rear right fender.  I am not done, I need to do some grinding and go over with the welder one more time.  Then grind again and then we might be ready to paint.

To weld and get ready to move on to other parts of the rear restoration.  I removed the tires so I can get into to weld and clean up the under portion on the rear of the tub.

Did quite a bit of cleaning the frame today, but still a long long way to go.

Once the underneath is cleaned and painted, I will get back to putting the rear panels back on and finishing up the rear.

Can't wait to see this finished.  Should look great.


Sunday, November 6, 2011

Fall / Winter Projects 2011

I mentioned in the previous post, I am changing gears with the weather and focusing on smaller projects.  Projects that take one day, maybe two.  Painting is optional, depending on temps.

So here is the list: (in order of priority)

windshield removal & evaluation
tailgate hinges restored
rear panel replacement found
rear valence replacement found
rear driver side corner prepped
spare tire restoration
dashboard removal
rear frame restoration
air cleaner replacement
secure battery


Saturday, August 7, 2010

Wakefield Willys Update 3.12

So back in July, I began making this repair and posted about the beginning stages. I set it aside to work on other mini projects, and got back to it today.

In the first picture, you can see the rusted panel and the need to replace it. It is where the passenger fender meets the jeep tub. And important and strategic fix.

The second picture shows the cut and the third picture shows the new panel in place after welding it to the rest of the tub.

It is not done, but we are getting close. I just need to grind down the welds (in process), bondo the seam, and sand it and prime it.

With the frame up to the tub completely sanded down and painted, the body work on the front end restoration is almost done. Wow. A lot of work, but I am sure it will look great once all assembled.

I still have a ton of body work on the tub, but this is a good start.

Monday, July 26, 2010

Wakefield Willys Update 3.11

What a beautiful day in NH. The kinda days to work outside on a Willys.

Finally got the snowplow assembly off! Whoo Hoo!!! Thanks to the Master Mechanic's advice to pick up an air tool set at Lowe's, I got the last bolt off and the snow ploy assembly dropped to the ground.

This was important, as it is in the way, and kept me from getting to the frame to clean it up and paint it. Plus it made it difficult to use a jack to lift up the front axle.

With the plow assembly off, Drew and I started wirebrushing the frame and cleaning the firewall. Painted the firewall and painted the frame up to the front cross member. All in all a good day, and making progress on the front end. Pretty soon all we will have to do is the engine work! We are nearing the finish line on the front end restoration.

Pictured is the newly painted grill in natural sunlight. Looks better out of the tent, and gives a good indicator of what the front end will look like all painted up.

Friday, January 15, 2010

Success!

After using a torch, a high powered reciprocating saw and a sledge, the bumper finally gave up the ghost and came off.

The key was a diamond blade I picked up at Lowes. Where other blades went dull and were useless in 5 minutes, the diamond blade kept going. $$$ well spent.

After getting some significant cuts, I would jack up the bumper and wail on the frame with a sledge. That tension and the previously cuts made it easy for the frame and the bumper to separate.

To say I am thrilled is an understatement. This was a major project this winter, and glad to see it off and in storage, ready to be refinished. Success indeed!


Sunday, September 20, 2009

Wakefield Willys Update 2.5

The air is turning colder, had our first 30 degree reading overnight. That means we are inching closer and closer to the season when we can't paint. And not painting means no body and frame work. Yes, we could do some welding, but I haven't found a welder yet. But certainly we will need to focus on other projects.

So we are trying to get some last minute restoration projects in. We have worked on both bumpers, sanding them and painting / undercoating them. Looks good.

We have done some minor gas tank repair, without success. We need a new tank, but I am not sure I am going to replace the one under the driver seat. Not exactly the safest place to put it.

Couple odds and ends, cleaning up some parts that are laying around that could be used in the project, or sold. The new wire bush attachment on the grinder is making this a lot more fun, and easier.

That is about it. chuggin along.....