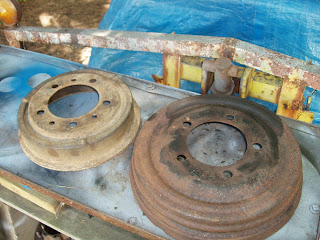


Early CJ-5 11 inch Drum Brakes Swap
(Parts List & Equipment List)
by Jason Wakefield, August 2009
I have read several article on the subject, which have all been helpful. But I noticed some gaps in the information, particularly the parts list and what equipment you might need. So I decided to write an article for my own sanity and maybe for someone else that may partake on this quest. I am glad I did the swap, and have no regrets. I think anyone wanting to drive their early CJ-5 around should consider upgrading the brakes.
Simple Explanation
To convert the original 9 inch drum brakes of of an early CJ-5 to 11 inch drum brakes from a later Jeep model. I have a 1960 CJ-5 and this should work with CJ5 through 1971, and some CJ-3B Models.
Parts List:
4 11 inch back plates & brake drums ( 1972-1976 Jeep CJ-5, 1967-1970 Jeep Wagoneer, Jeep Truck, you can also find after market parts on websites like 4wd.com)
(BTW – You can continue to use your original hubs, they fit with these brake drums)
2 Sets of 11 inch brake shoes
2 Hardware Kits for installing brake shoes (springs, pins, etc....)
2 Left Side self adjustment kits
2 Right Side self adjustment kits
4 Wheel Cylinders ( all 4 are different)
8 5/16 bolts (½ inch length) for mounting the wheel cylinders to the backplates
8 5/16 locking washers for mounting the wheel cylinders ( looks like a star)
8 Wheel Cylinder Links ( your 9 inch drums do not have these, but your 11 inch drums do)
4 Brake Shoe Retaining Washer ( Diamond Shape, attaches top of the backplate. Mine were already attached on the donor backplates.)
2 12 inch rubber brake hoses for the front.
2 30 inch 3/16 brake line ( rear brakes)
1 12 inch ¼ brake line (front left)
1 40-50 inch ¼ brake line (front right)
1 30 inch ¼ brake line (Master Cylinder, could be optional)
2 3/16 to ¼ brake line adapter
1 Rubber Rear Brake Hose (Looked fine on the outside, but mine was junk, best to replace)
2 inch long collar pins ( you need 2 new ones to replace the ones you pull out of the rear axle)
Brake Fluid
Where to find Parts
These parts can be found almost everywhere, although some were harder to find that others.
For me, the break down was as follows:
Backplates, Drums ( donor parts from a Jeep Farm), Brake Shoes, Rubber Hoses, Wheel Cylinders, Hardware (4wd.com), Self Adjuster Kits (Auto Zone, can be bought at 4wd.com), Bolts & Washers ( Local Hardware Store), brake fluid, grease, brake lines, adapters (Local Auto Parts Stores), Wheel Cylinder Links ( Jeep Dealership)
Many of these parts took time and shipping to get to me. So don't run to the Auto Parts store hoping all of this is in stock, it probably won't be. The hardest part to find was the Cylinder Links. Let me explain.
How I found the Wheel Cylinder Links
When visiting a Jeep Dealership, surprise surprise, their computers are not exactly equipped to find vintage parts for your Jeep. It took some effort on my part, and the parts person to find the Cylinder Links. We look through diagrams of Wranglers, Wagoneers and finally found it by looking at XJ Cherokees from 1985. In my case, he happened to have 2 of them, and comparing with one that was left over from my backplates, we confirmed it was the same part.
So my advice here is simple. If you pick up donor backplates, do not immediately throw out the hardware and parts attached. You may need them as a reference. It was extremely helpful to have a Cylinder Link in my hand when looking for this part.
The Part Number at the Jeep Dealership was # J0048331
Left & Right Backplates, Which is Which?
When I picked up my backplates, 2 were left, and 2 were right, but which was which? It is very simple.
Looking at the photo, you can see a RECTANGULAR NOTCH at the bottom of the backplate, and if you notice, it is slightly off center. When looking at them, the NOTCH will be either slightly to the left or slightly to the right. The NOTCH is for the star adjuster on your brake drums.
Backplates with the NOTCH Slightly to the RIGHT (LEFT SIDE, DRIVER SIDE)
Backplates with the NOTCH Slightly to the LEFT (RIGHT SIDE, PASSENGER SIDE)
SIMPLE!
Brake Lines
This was one of the gaps in the information I mentioned at the beginning. It is not a big deal, brake lines are usually easy to come by. But I thought I would give a brief explanation of why you are buying new brake lines.
Rear brake lines are 3/16 in diameter, and connect directly into the wheel cylinders. On the old Wheel Cylinders, they go straight in, but the new wheel cylinders connect at a 45 degree angle. Not a big deal, but that means either bending the original lines or just installing new ones. I chose to install new ones.
The front lines are more complicated. The original lines are 3/16 lines, but that is a problem for the conversion. The 11 inch wheel cylinders and rubber hoses that come out connect to a ¼ inch brake line. So what do you do? Well obviously you need to connect ¼ brake lines, but then you get to the junction box on the front left fender and it is a 3/16 connection.
If you do not know what I am talking about, there is a junction box where the Master Cylinder Brake Line comes in from the top, and splits 3 ways. One line goes to the back axle, and the other 2 go to the front brake lines. But those 2 front lines are 3/16, and you need ¼ to connect. My solution, use adapters at the junction box to connect your ¼ lines into a 3/16 opening on the junction box.
OPTIONAL PARTS & EQUIPMENT LIST
2 1/16 Inch Spindle Nut Socket ( Highly recommended, for front axle)
Hub Puller ( For the rear axle, borrowed from Auto Zone, worked great!)
Basic Brake Tools
3ft (approx.) piece of wood with ¾ hole at the end (could be a 1x2, 1x4, nothing too big)
Punch, Hammer ( for getting bearings out, hammer is useful in get drums and hubs off)
4 Bearings for front hubs2 Grease Covers for hub
New Studs & Lugs
Axle Grease
Spindle Nut Socket
Yes, people are able to get the bolt out with a chisel and hammer, but I get impatient. Having the right tool makes this job a snap. I found it at 4wd.com. For a few $$$, it seemed worth it.
Piece of Wood
So you have the Willys Jeep up on Jack Stands and you start yanking on one of the axles and it spins. And you find there is no way to get any grip. Solution => Attach a piece of wood to one of the studs on the other side of the Willys, and wedge it up in the fender so the hub can not move. Worked perfectly. Does not have to be 3 ft, measure to make sure, and use any old scrap wood. Worked great for me.
Removal of Rear Hubs
A Hub Puller was absolutely necessary, no way to get around this. BEWARE! CAUTION! When you build up the tension on that rear hub, it will explode of the axle. One flew 3 ft in the air, and the other over a foot. Stand to the side when you are turning the hub puller and hitting the hub with a hammer. This was very exciting, but could have been painful.
Front Bearings & Studs
You have them off and you can easily replace them. Why not? If you are going to restore, mine as well take care of this while it is off. The inner and outer bearings are the same, took 10 minutes to do, and looked great. It is also a good time to replace studs if they look bad and beat up. Again, it is easy to do and you have it off the Jeep.
Conclusion
If there are parts and equipment I failed to mention that others found necessary and useful, let me know. My goal was to create a list that would be a comprehensive as possible. I like having all my parts and equipment assembled before moving forward. Enjoy the Quest, it will be worth it!

1 comment:
Online store offers verity of Honda parts and accessories including new replacement auto parts, aftermarket parts, original/OEM parts, refurbished/remanufactured/rebuilt auto parts and used part locating services. Our site offers online access to multiple automotive part stores.
****************************************
thanks
Honda auto parts
http://www.hondapartx.com
Post a Comment