Sunday, November 20, 2011

Wakefield Willys Update 4.10

FOUND!  1 Willys CJ5 Windshield, and in record time!

I spent several years looking for a tailgate, the windshield was found in less than a few weeks.

This is off of a 1965 CJ5, solid except for the top portion of the windshield that will require some serious welding and steel replacement.  Not that much work, but work nonetheless.

We cleaned it up, with the help of my assistant and will set it aside for the winter. 

This Willys Jeep is a real suvivor, and a true Northeast Jeep.  Parts have come from MA, CT, PA, NY and of course NH to build this CJ5.  Very cool.


Saturday, November 12, 2011

Wakefield Willys Update 4.9

We are in the midst of Small Fall Projects.  Already have a few knocked off which feels good.

The windshield was removed from the 1957 Willys, and unfortunately it does not look salvageable.  It  looks fine inside and out, but the hinge corners where completely rotten out.  This is a setback, and hopefully we can find a replacement.

The aluminum top of the 1957 is also completely unbolted.  I cut the last bolt and it is ready to be removed.  That will make way for some more salvage work.

Other than that, we are golden.  Painting for the most part has come to a complete stop.  The overnight temps are not helpful.  Hence the focus on salvage work.

Sunday, November 6, 2011

Fall / Winter Projects 2011

I mentioned in the previous post, I am changing gears with the weather and focusing on smaller projects.  Projects that take one day, maybe two.  Painting is optional, depending on temps.

So here is the list: (in order of priority)

windshield removal & evaluation
tailgate hinges restored
rear panel replacement found
rear valence replacement found
rear driver side corner prepped
spare tire restoration
dashboard removal
rear frame restoration
air cleaner replacement
secure battery


Saturday, November 5, 2011

Wakefield Willys Update 4.8

Well, as the cold weather approaches, it is time to find small projects that are simple and will help when Spring comes.

In the picture are 2 tailgate hinges.  One with the bolts cut off, the other in process.  Also in the picture are the common tools to cut bolts.

An Angle Grinder with a cut off wheel.  A punch, hammer, and a set of pliers.  I can't count the times I have used these tools to cut bolts.  Very necessary when working with rusty jeeps.

From now until the snow flies, I will be doing simple projects like this to set the stage for further body work.  Small, but necessary and helpful.

Tuesday, October 25, 2011

Spare Tire Mount Fix on a Early CJ5


Milestone!

Less than 24 hours ago I finally finished the passenger side of the Willys Tub.  Yes, there are some odds and ends to address, but for the most part, we beat the cold weather and got the side of the Jeep painted.  Pictures of that will be coming hopefully soon.  I need to get the Willys back on its tires and get it running.  It has been a while.

Anyhow, what we have here in these series of pictures is common problem in these older jeeps.  The spare tire mount after years of use bends and warps the metal and eventually rots the corner away making a repair necessary.

Learning from a fella in AZ who made this fix, I used treated wood to help secure 2 of the bolts that before simply went into the sheet metal.

The fix is fairly straightforward.  Cut out the bad steel, attach the wood cross section to the steel cross section and then weld a new piece of steel to the rear fender.  A little grinding, drilling of new holes and you are ready to paint.

I have found some interior work that also needs to be done to really make this fix stick.  But as I said, for the most part, it is fixed and ready to take a spare tire!


Tuesday, October 11, 2011

filling in screw holes

I am seriously enjoying this type of body work.

I have a serious amount of screw holes on the top of the tub.  I use a MIG Welder to fill in the holes and then grind them down so they are flush with the body.  Simple!

But what has made this a lot easier are these 2 round magnets.  Years ago when I was showing the kids the insides of some electronic device, I found these brass magnets.  I like magnets and hung on to them.

They have made this job so easy.  I just slip one of them behind a hole, zap the hole with the welder, the magnet holds the weld together.  The brass does not bond with the steel, so they remove easily.

Like I said, simple!

Saturday, October 8, 2011

Wakefield Willys Update 4.7

I might have a new name for the Willys Project, "Patches"

Because I can not afford a new tub and the new tubs don't have some of the character of the original tub, I am "repairing" the original tub.

That means removing the paint, the rust and dirt and working with what is left.  Sometimes it requires patch work.  Cutting rusted no good steel out and replacing it with a new 16 gauge piece from the local hardware store.

I like doing it, even though it is tedious work.  But I am quickly realizing that no matter how good the welding job, grinding job or sanding job I do, you will see the patch work.  Not to mention the filled in holes, and every ding dent and scratch.

It is getting frustrating, but I think I am coming to grips with this reality.  This tub is going to look more like a quilt than I first thought.

Saturday, October 1, 2011

Wakefield Willys Update 4.6


As you can see by the pictures, we are working on the passenger side of the Jeep Tub.  You can also see there is a lot of work to be done.  These picture were taken before I got started on Saturday.

Today I was able to make a lot of progress.  Most of the paint is now stripped off, along with some bondo.  Some of the 60 holes in the tub on the passenger side are filled in using the welder.

As usual, in peeling back the paint and cutting out some of the rusted steel, it has revealed some further work.  Ahh, the joys of restoration.

My hope would be to get all the way back to rear of the jeep and have the passenger side painted.  We will see, stay tuned!

Saturday, September 17, 2011

Wakefield Willys Update 4.5

 As I have said before, it has been a slow summer.  Not much work on the Willys Jeep.

Today I put the final touches on the Passenger Side Windshield Hinge Fix.  With some welding and grinding we are almost ready to paint.

Now it is time to start repairing the Jeep Tub on the Passenger Side.  The funny thing is when you start to take away the paint the Jeep looks like it was shot at with either a shotgun or rifle.  Those are rust holes that the grinder exposes.

Some of the holes were hidden by and old Pennsylvania Inspection trick.  In Pennsylvania, like NH, they look for "holes" in the body.  If your car looks like Swiss cheese, it does not pass inspection.

So if it is a small hole, like some of these on the side of the jeep, they would simply put a screw there bolted from inside.  All those holes you see where former screws.  Funny solution, and clever at the same time.


Saturday, July 9, 2011

Wakefield Willys Update 4.4

The driver side windshield corner is nearly done.

From the picture you can see the final steel piece welded in and ready for some grinding, primer and then paint. It came out better than I expected, still rough, but over all a vast improvement over what was there.

Now for the rest of the jeep tub........

Saturday, June 25, 2011

Wakefield Willys Update 4.3

I have not been busy with the jeep this summer. I need to be as it will not fix itself. Over the last few weeks, things have picked up.

As mentioned in a previously post, the windshield corners were rusted out and need to be cut out, and new sheet metal welded in place.

Well as you can see, we finally have started replacing the sheet metal. Started with welding the bolts in that will be used to screws the windshield bracket itself. Then the first piece of steel, and after the primer dries, the second piece that goes on top of it. Once welded, and primed, we will be done! At least with this one corner, the other corner is still waiting.

Thursday, June 2, 2011

Oil Bath Replacement on a Willys

The Old Willys Jeeps use an Oil Bath Air Filter Setup. Very common, most guys like it and stay with it. I for some reason am not a fan. But the alternatives have not been great.

I stumbled across this recently, and may give it a try.

WW2 Air Filter Conversion

I like the fact that it keeps the original look, while switching to a dry filter system. I may give this a shot.

Thursday, May 5, 2011

Wakefield Willys Update 4.2

This update will be a surprise, as my last one mentioned getting started on body work. But I got sidetracked, in a big way.

Coolant has been leaking all winter and spring, and a few weeks ago I figure out the source. A gasket on top of the engine block above the thermostat.

Not a big deal, but the fix created more problems, and the simple fact was the cooling system was not doing it's job properly. After a change of a thermostat, and some good counsel from the Master Mechanic, the coolant system burbed up its last air bubble and is now running properly.

A major distraction from the body work, but now that it is settled, I feel a lot better.

The only progress on body work is that the top on the 1957 Willys is close to being removed.

Tuesday, March 15, 2011

Wakefield Willys Update 4.1

It's a new year, and time to get cracking on the Willys Project!

Every Winter, the project comes to a stop for the most part. I do some research over the cold months, look for parts. I just picked up a spare tire that has been hard to find. I also looked at a jeep tub that might be better than the one I have. It was not.

And that is where the focus of the project is for the next year.

The Tub.

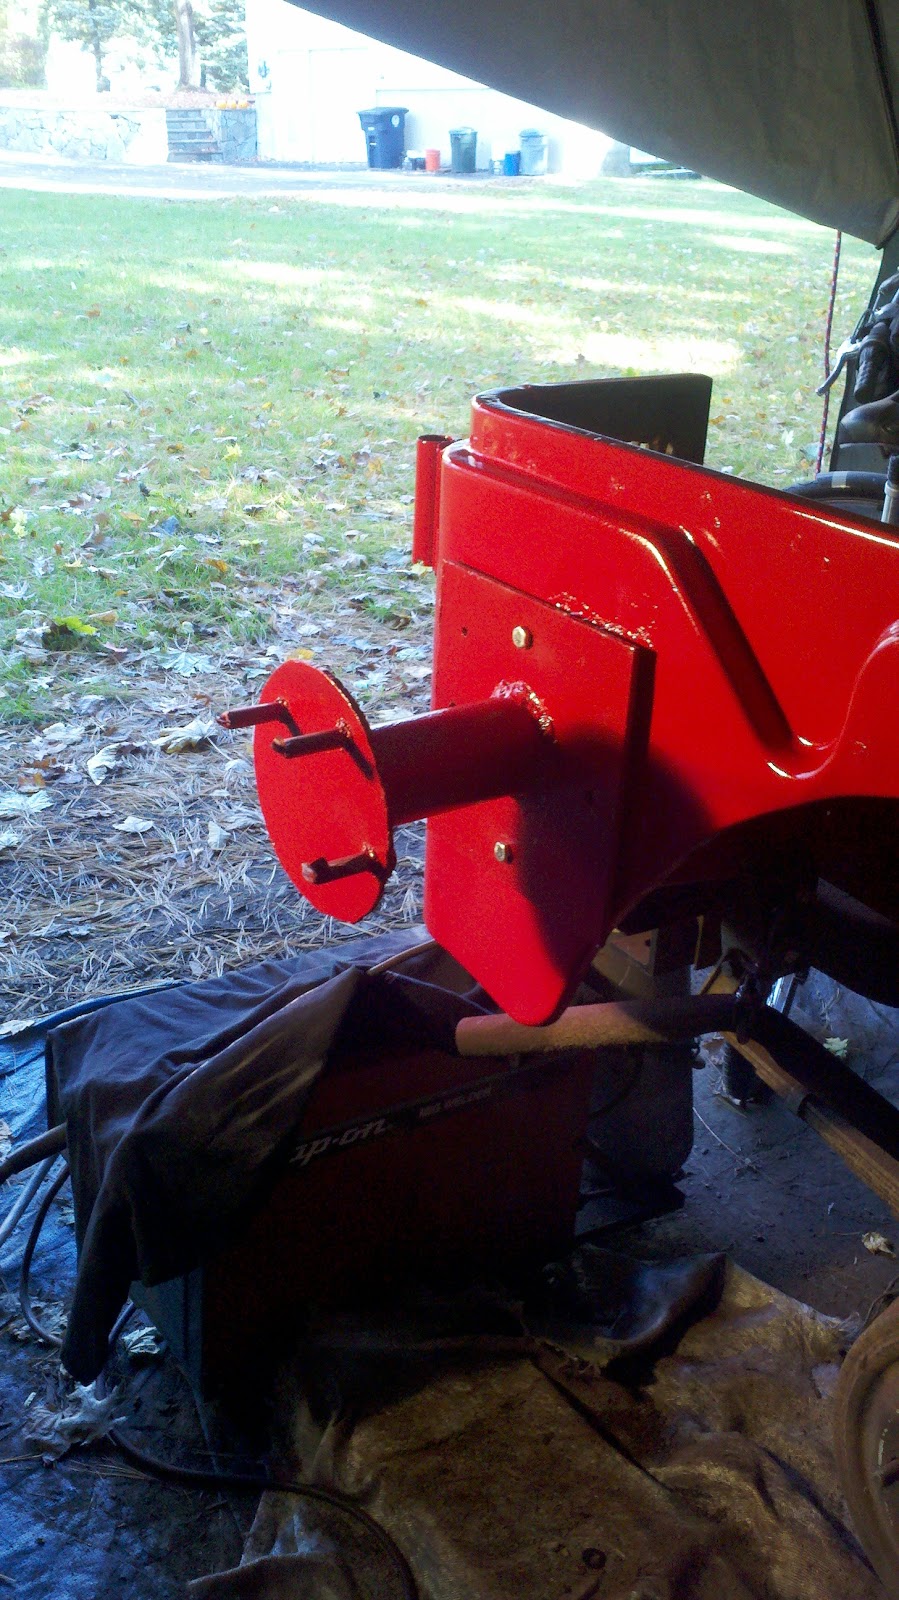
For those not familiar with the term, the tub is the body part pictured in this post.

It is all one piece, and is very very very difficult to find intact, particularly in the Northeast. It also has changed over the years in the early CJ5s, and we are probably going to repair the existing one on the 1960 Willys.

Fortunately, companies like quadratec.com have replacement panels and pieces to replace various parts of the tub. Once I start getting into working on the tub, I am certain we will be purchasing some of these replacement panels as I have a number of holes and dents to fix.

The plan is fairly simple.

Starting on one side of the tub, work around the tub until the sides are done, and then fix the floors. I have no idea how long this will take, but my guess is it will take at least the summer, if not longer.

Once the tub is fixed, electrical needs to be addressed, and we will be nearing the end of the project. As we are in year 4, I hope we are not far from being done.